...
Click on the network icon in the bottom right corner. Then select the UCCS-Guest network.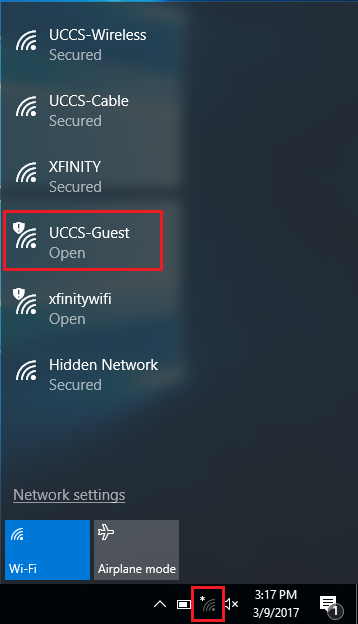
Step 2: Click Connect
Click Connect to begin connecting to the UCCS-Guest network. Leave the "Connect automatically" box unchecked.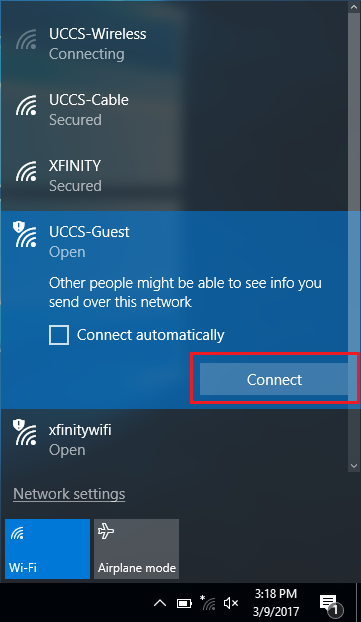
...
A browser window should automatically open once connected to UCCS-Guest. If not, launch a web browser. Click Under the Guest Account section click the Create Guest Account link.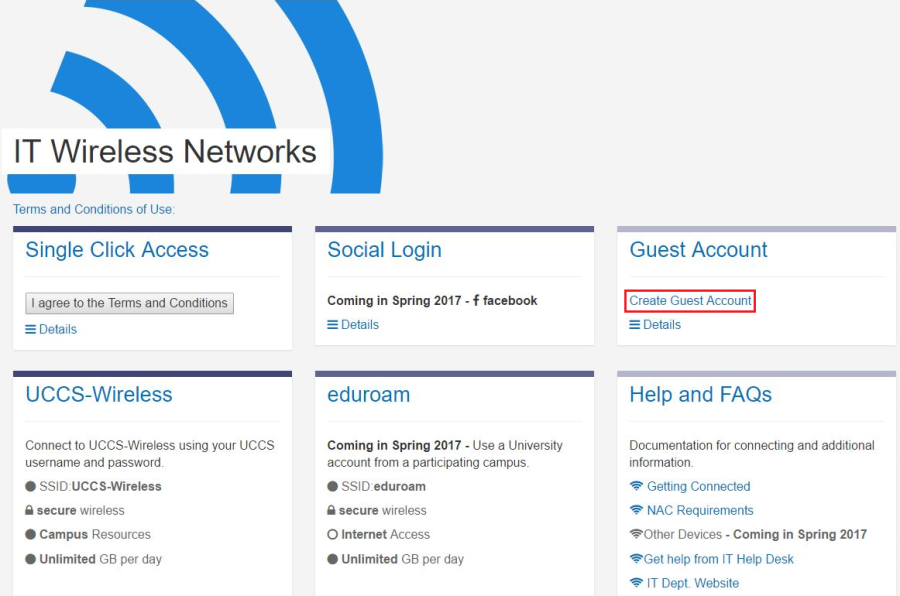
...
Step 5: Take Note of Guest Account Information
Take note of your newly issued guest login credentials (username and password) so you can use them to log into the UCCS-Wireless network in the steps below.
...
Click on the network icon again in the bottom right corner. Then select UCCS-Wireless from the list and click connect.
...
Step 7: Enter Guest Account Username/Password and Click Ok
Enter the Guest Credentials you the guest username and password you obtained from the registration step above and click OK.
...
To validate and see more information about the certificate, click Show Certificate Details.
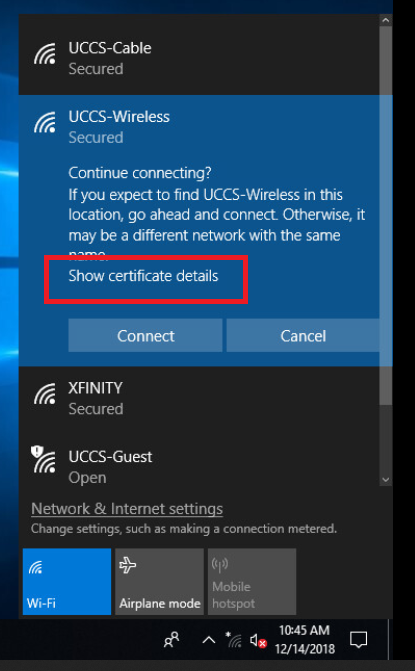
Step 9: Verify Security Certificate continued
The server certificate thumbprint should be displayed. It should match the SHA-1 fingerprint listed below.
If the fingerprint matches, click go ahead and click Connect.
NOTE → If the fingerprint do does not match, DO NOT trust the certificate! Click Click Don't Connect and and contact the OIT Helpdesk Help Desk for assistance.
| Info | ||
|---|---|---|
| ||
SHA-1 A7 D6 D8 4D FB 1F AC E7 B6 1F CD 59 A8 9A D7 03 77 A9 F8 09 |
...