| Table of Contents |
|---|
Step 1: Click Network Icon and Select UCCS-Guest
Click on the network icon in the bottom right corner. Then select the UCCS-Guest network.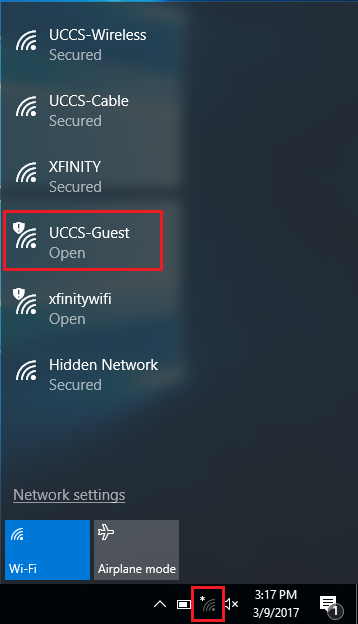
Step 2: Click Connect
Click Connect to begin connecting to the UCCS-Guest network. Leave the "Connect automatically" box unchecked.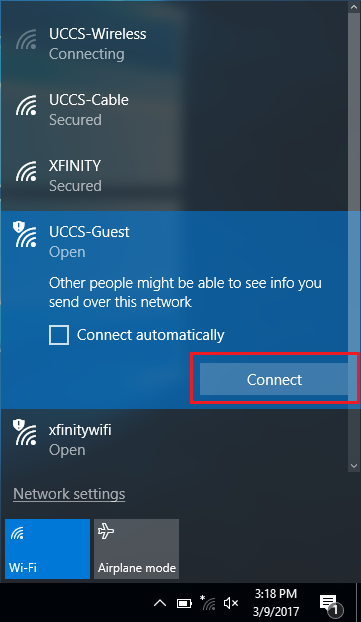
Step 3: Click Create Guest Account
A browser window should automatically open once connected to UCCS-Guest. If not, launch a web browser. Under the Guest Account section click the Create Guest Account link.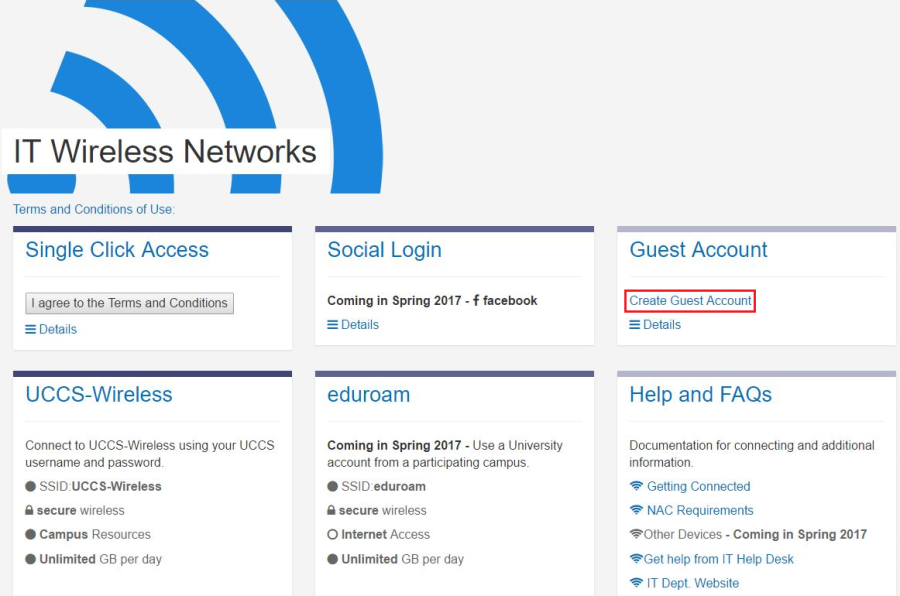
Step 4: Fill Out Form and Click Register
Fill out the form and then click the Register button at the bottom.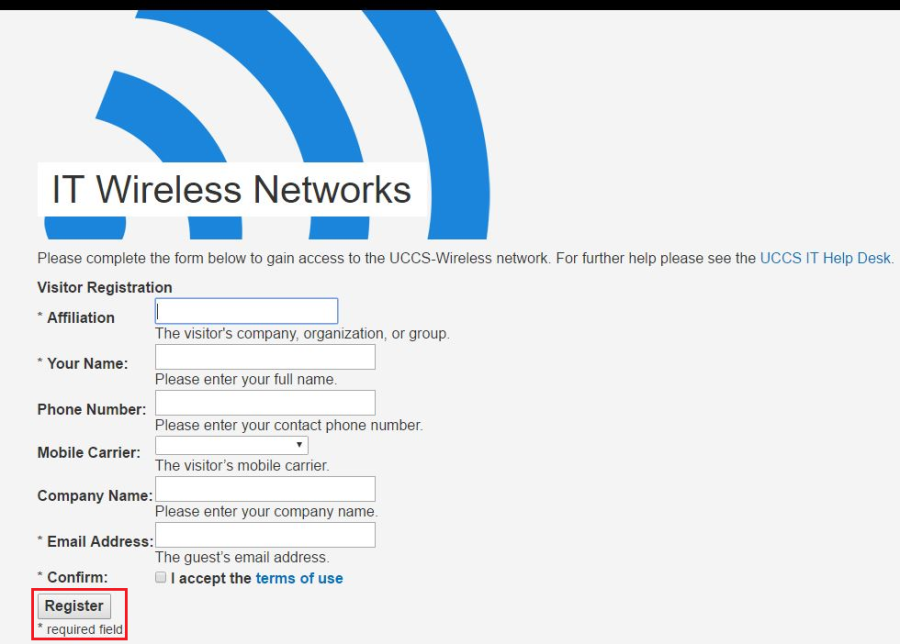
Step 5: Take Note of Guest Account Information
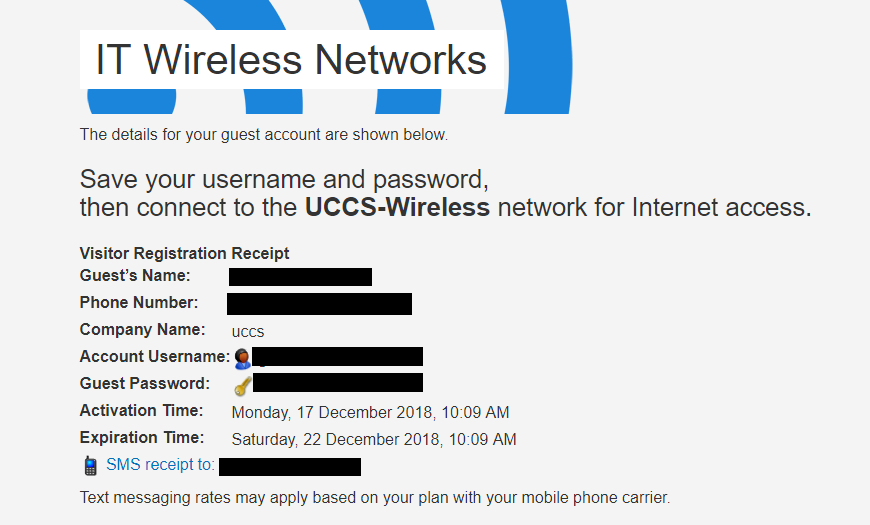
Take note of your newly issued guest login credentials (username and password) so you can use them to log into the UCCS-Wireless network in the steps below.
Step 6: Click Network Icon and Select UCCS-Wireless
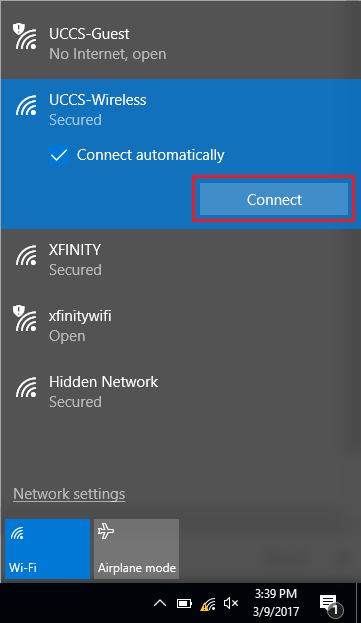
Click on the network icon again in the bottom right corner. Then select UCCS-Wireless from the list and click connect.
Step 7: Enter Guest Account Username/Password and Click Ok
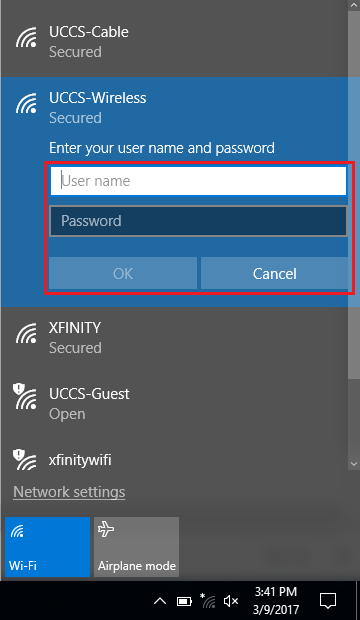
Enter the guest username and password you obtained from the registration step above and click OK.
Step 8: Verify Security Certificate
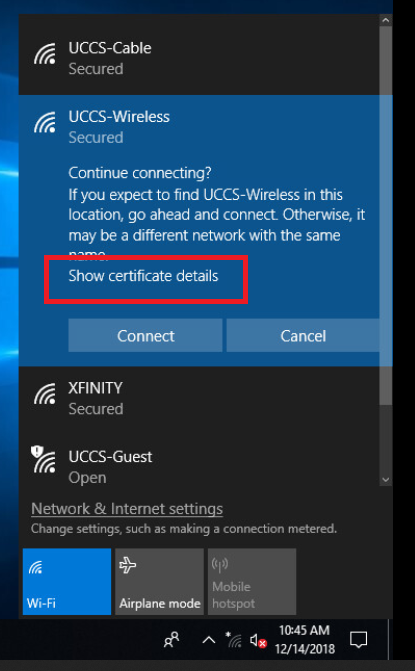
To validate and see more information about the certificate, click Show Certificate Details.
Step 9: Verify Security Certificate continued
The server certificate thumbprint should be displayed. It should match the SHA-1 fingerprint listed below.
If the fingerprint matches, go ahead and click Connect.
NOTE → If the fingerprint does not match, DO NOT trust the certificate! Click Don't Connect and contact the OIT Help Desk for assistance.
...