| Excerpt Include | ||||||
|---|---|---|---|---|---|---|
|
Steps:
| Table of Contents |
|---|
Step 1: Open Network Connections
Click the networking icon in the system tray, typically located in the lower right side of the screen.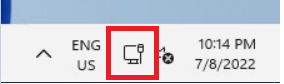
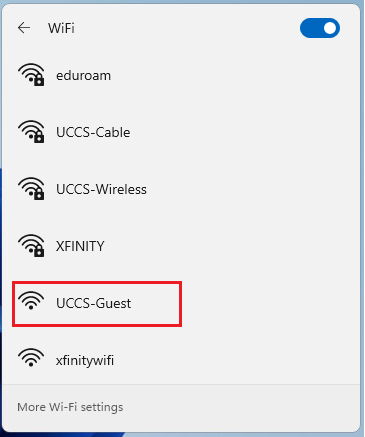
Step 2: Select the UCCS-Guest
...
wireless network
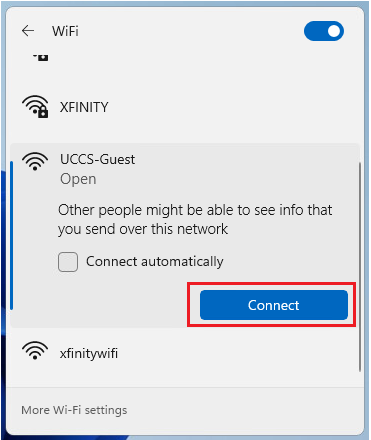
Click the right-arrow to open the list of wireless networks, and choose the UCCS-Guest network, then click Connect.
Note - if you want the computer to remember and save this network so it will automatically connect when in range, check the Connect automatically box.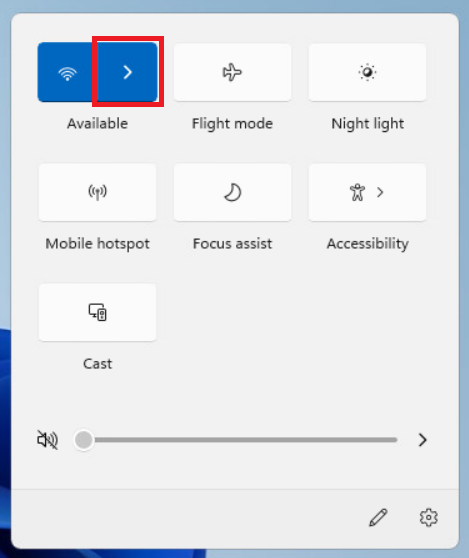
Step 3: Click Create Guest Account
A browser window should automatically open once connected to UCCS-Guest. If not, launch a web browser manually.
You should be redirected to a captive portal. Under the "Guest Account" section click the Create Guest Account link.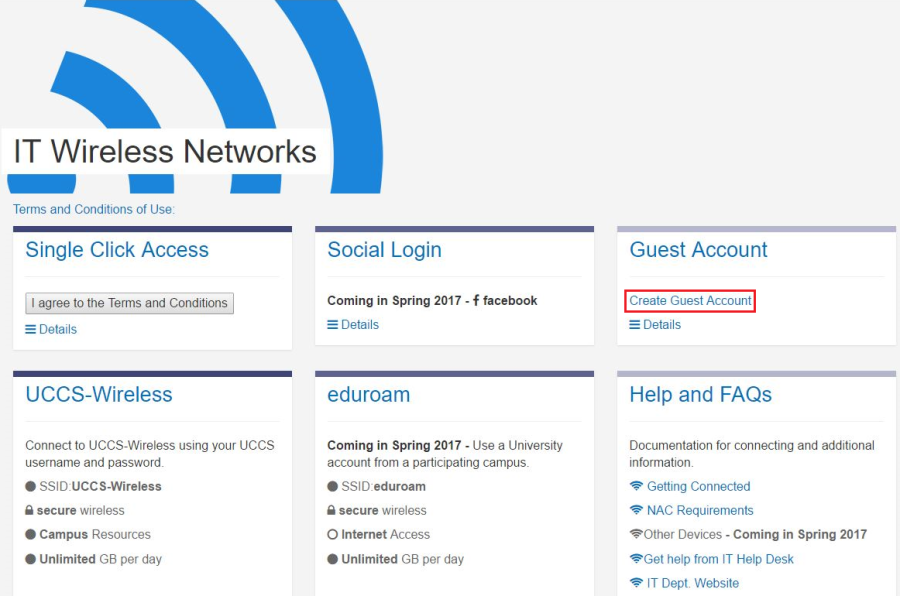
Step 4: Fill
...
out the form and click Register
Fill out the form and then click the Register button at the bottom.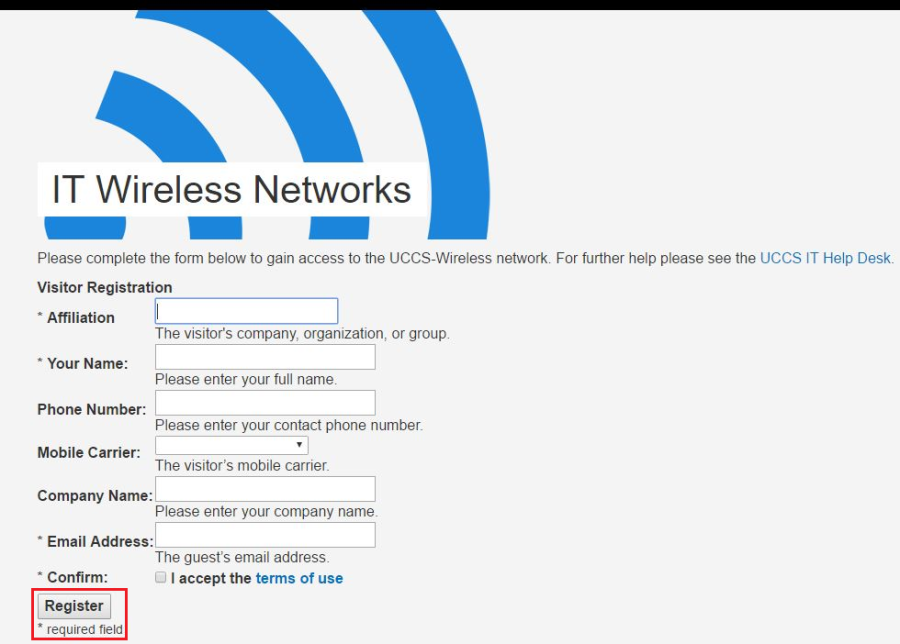
Step 5: Take
...
note of your Guest Account
...
information
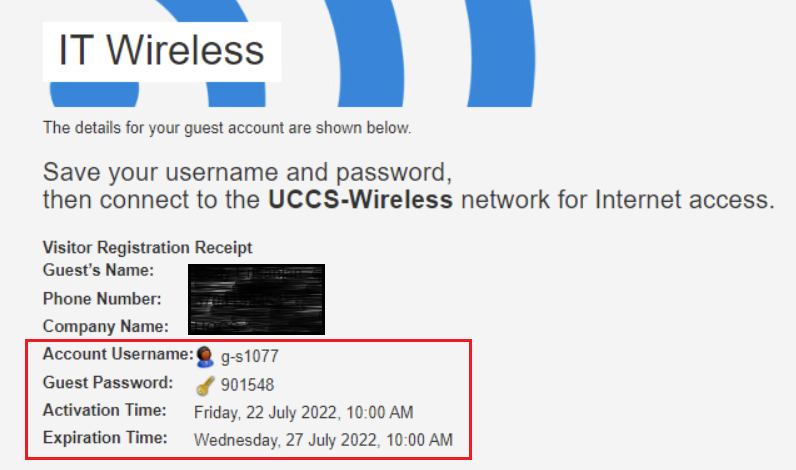
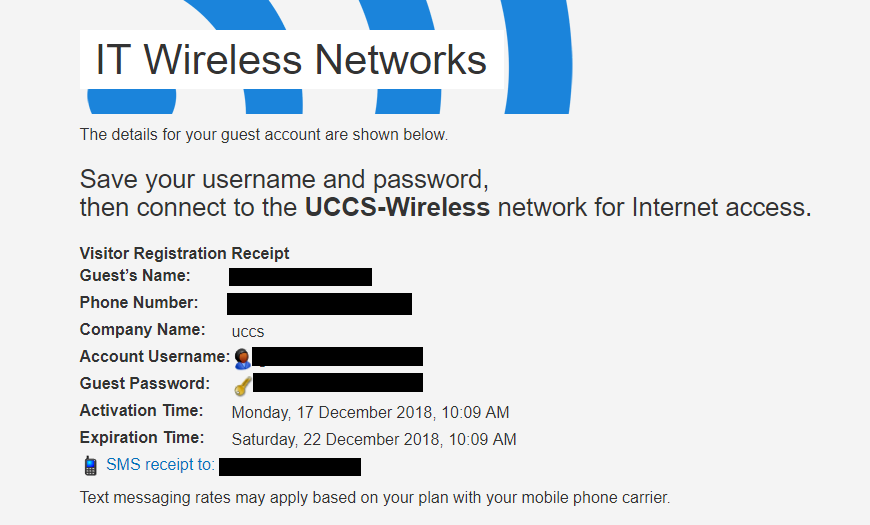
Take note of your newly issued guest login credentials (username and password) so displayed on screen so you can use them to log into the the UCCS-Wireless network in the steps below.
You should also receive an email receipt with your username and password. If you entered your phone number and carrier, you should also receive a text message with the information.
Step 6:
...
Open Network
...
Connections and
...
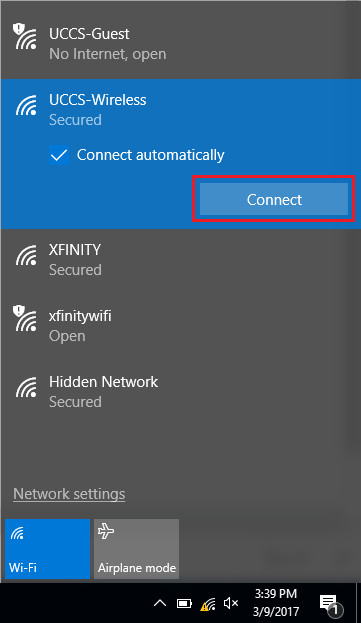
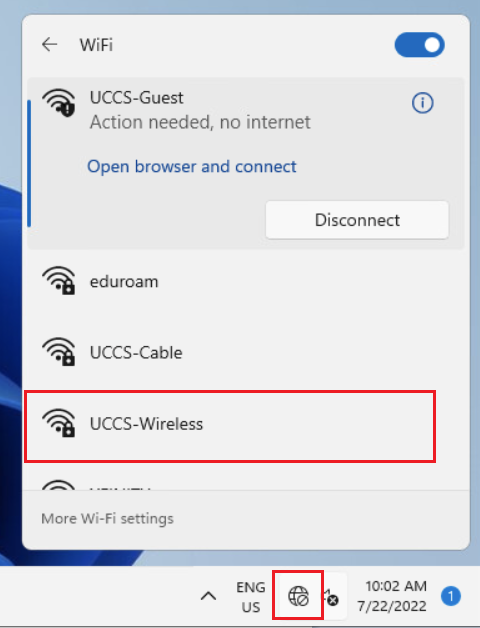
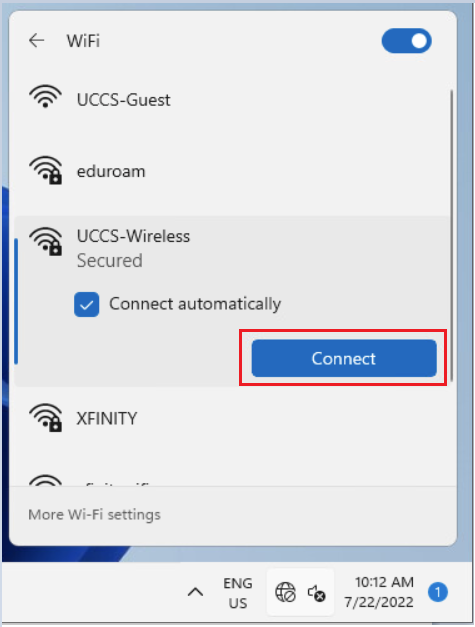
select the UCCS-Wireless wireless network.
Click on the network icon again in the bottom right corner. Then select UCCS-Wireless from the list and click connect.
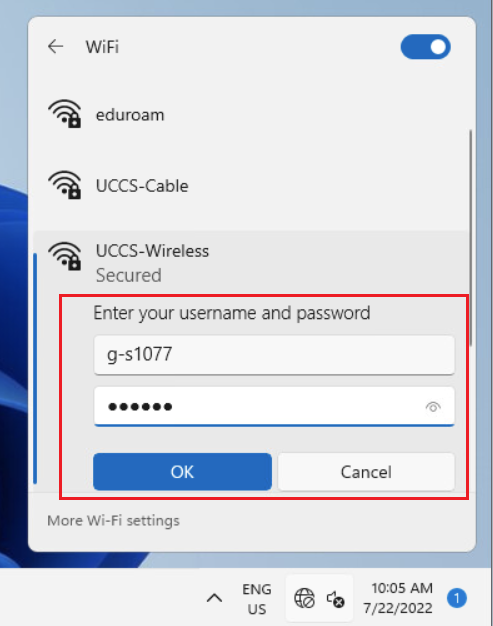
Step 7: Enter Guest Account Username/Password and Click Ok
Enter the your guest username and password you password you obtained from the registration step steps above and click click OK.

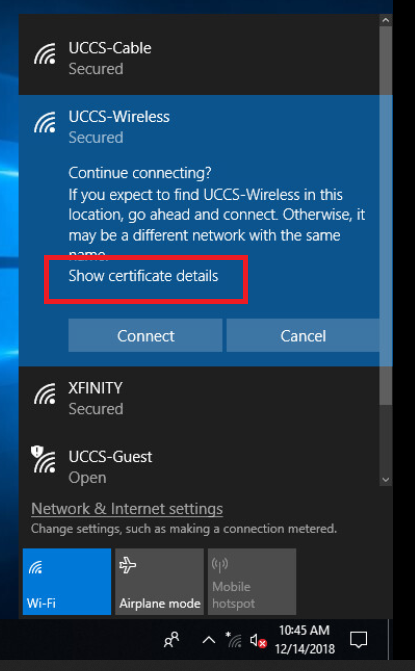
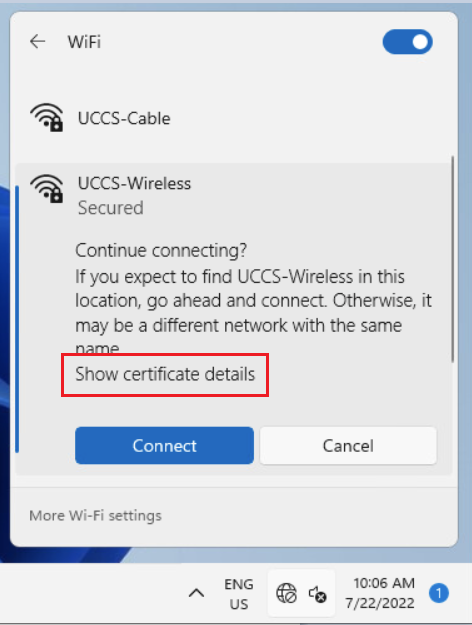
Step 8: Verify Security Certificate - part A
To validate and see more information about the certificate, click Show Certificate Details.
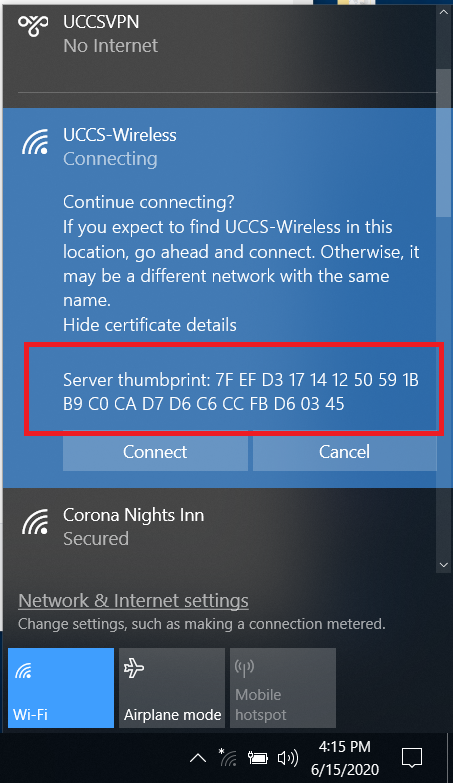
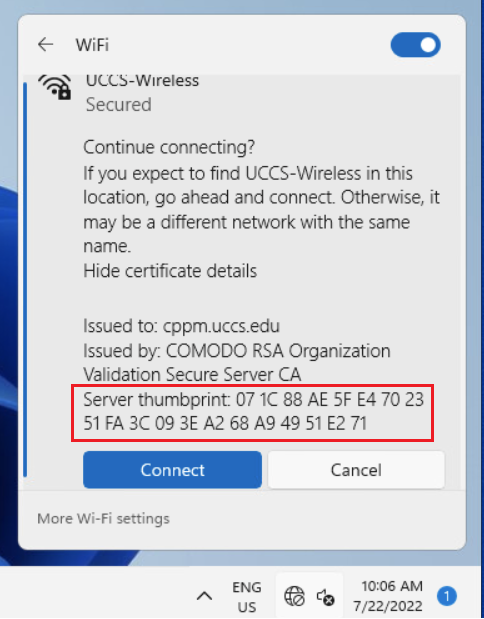
Step 9: Verify Security Certificate - part B
The server certificate thumbprint should be displayed. It should match the SHA-1 fingerprint listed below.
If the fingerprint matches, go ahead and click Connect.
NOTE → If the fingerprint does not match, DO NOT trust the certificate! Click Don't Connect Cancel and contact the OIT Help Service Desk for assistance.
| Excerpt Include | ||||||
|---|---|---|---|---|---|---|
|
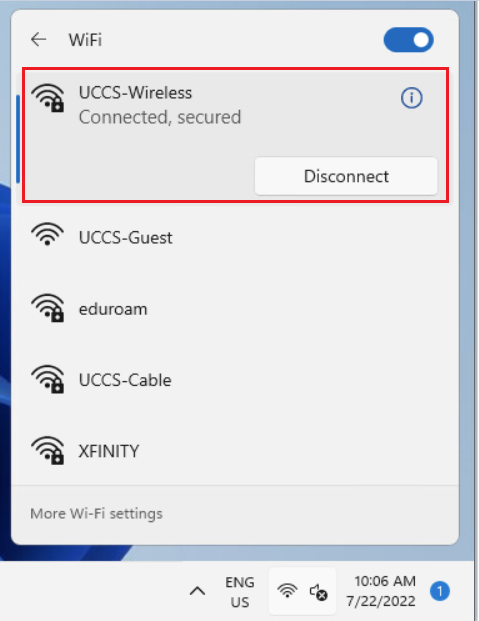
Your device should now be connected to UCCS-Wireless.
Still having problems? Please contact the OIT Help Service Desk.