Windows 10:
- Open the Settings app and navigate to Network & Internet > Wi-Fi (or Ethernet if wired) > [Network SSID] (or "uccs.edu" if wired)
- Scrolling down to the properties section, you should see the devices MAC address and IPV4 address:
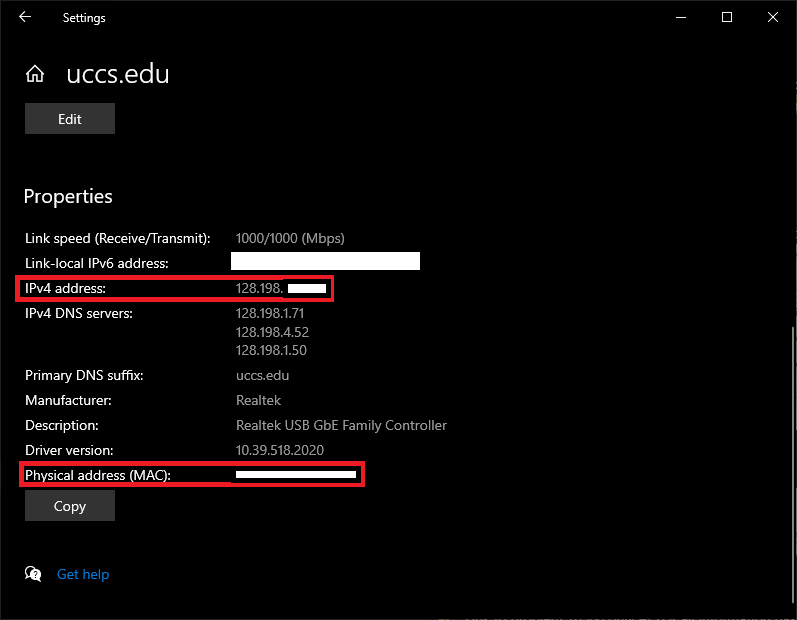
Note: The above screenshot was taken on a Windows 10 PC with a WIRED connection.
Windows 11:
- Open the Settings app and navigate to Network & Internet (Left-hand column) > Wi-Fi (or Ethernet if wired) > [Network SSID]
- The IPV4 address and MAC address should be towards the bottom:
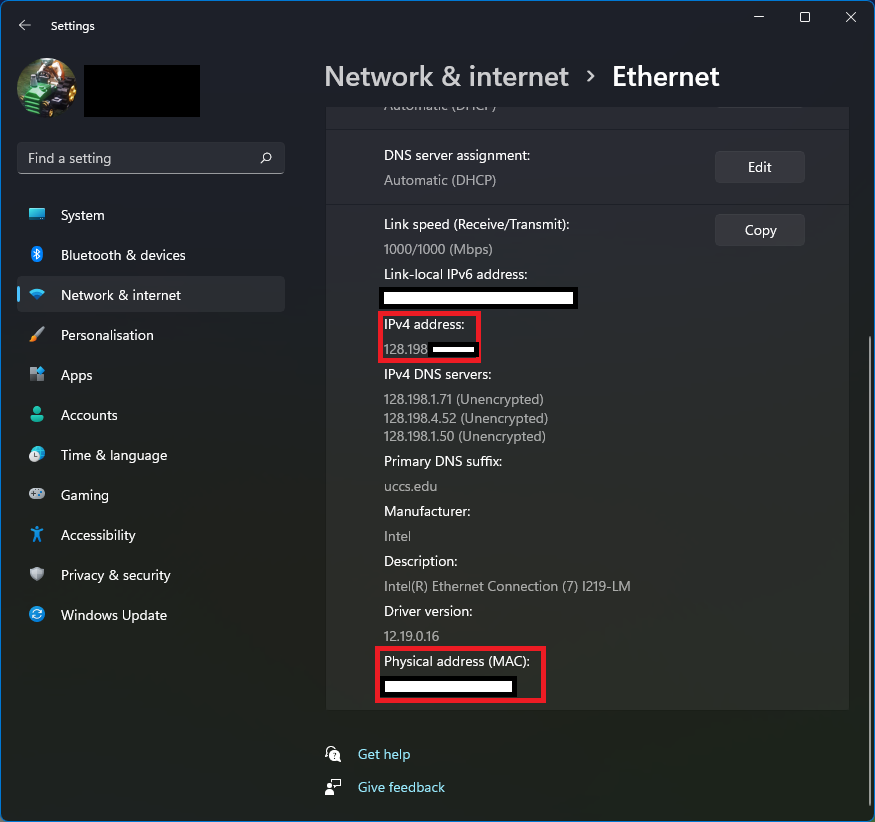
Note: The above screenshot was taken on a Windows 11 PC with a WIRED connection.
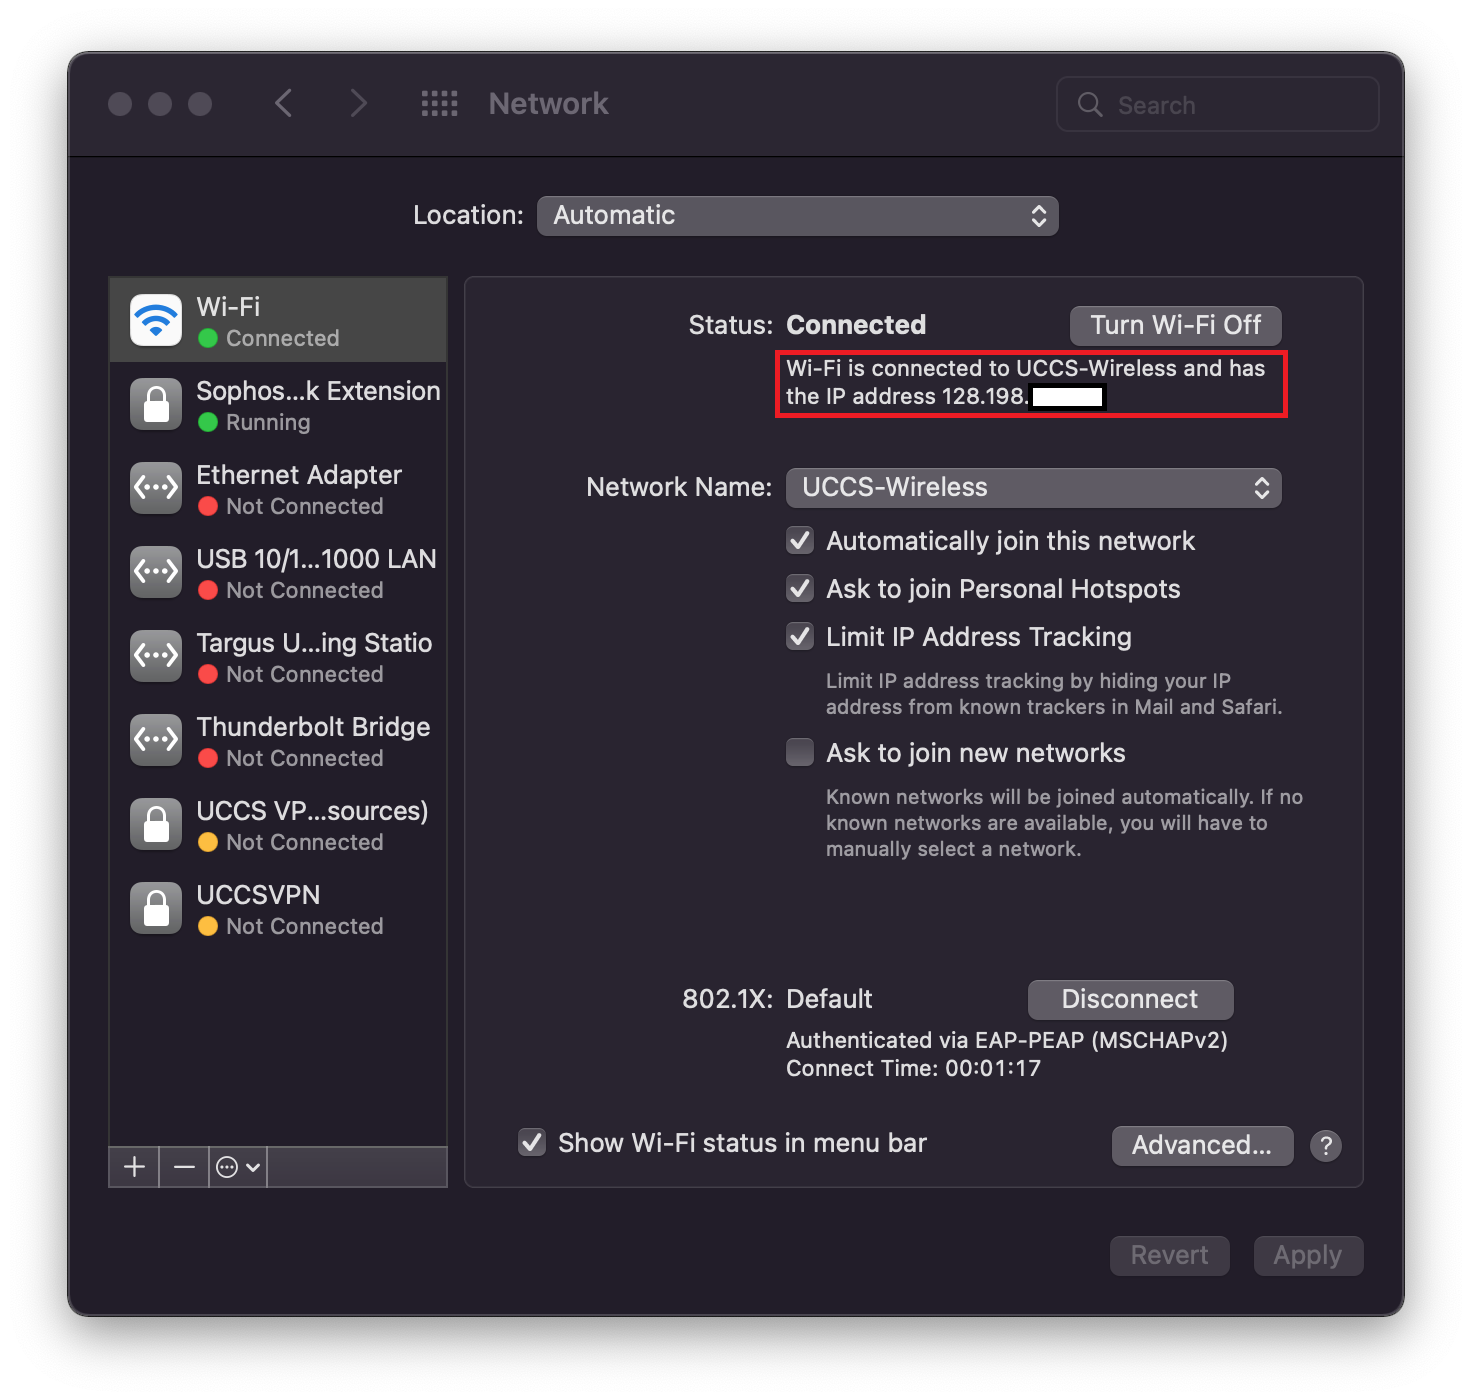
MacOS:
Version differences
There shouldn't be any major differences in this process between the currently supported versions of MacOS (10.14, 10.15, 11).
- Click on the Wi-Fi icon in the top right of the screen and click Open Network Preferences
- Click on Wi-Fi (or whatever your wired Ethernet connection is called) and the IPV4 address should be listed there.
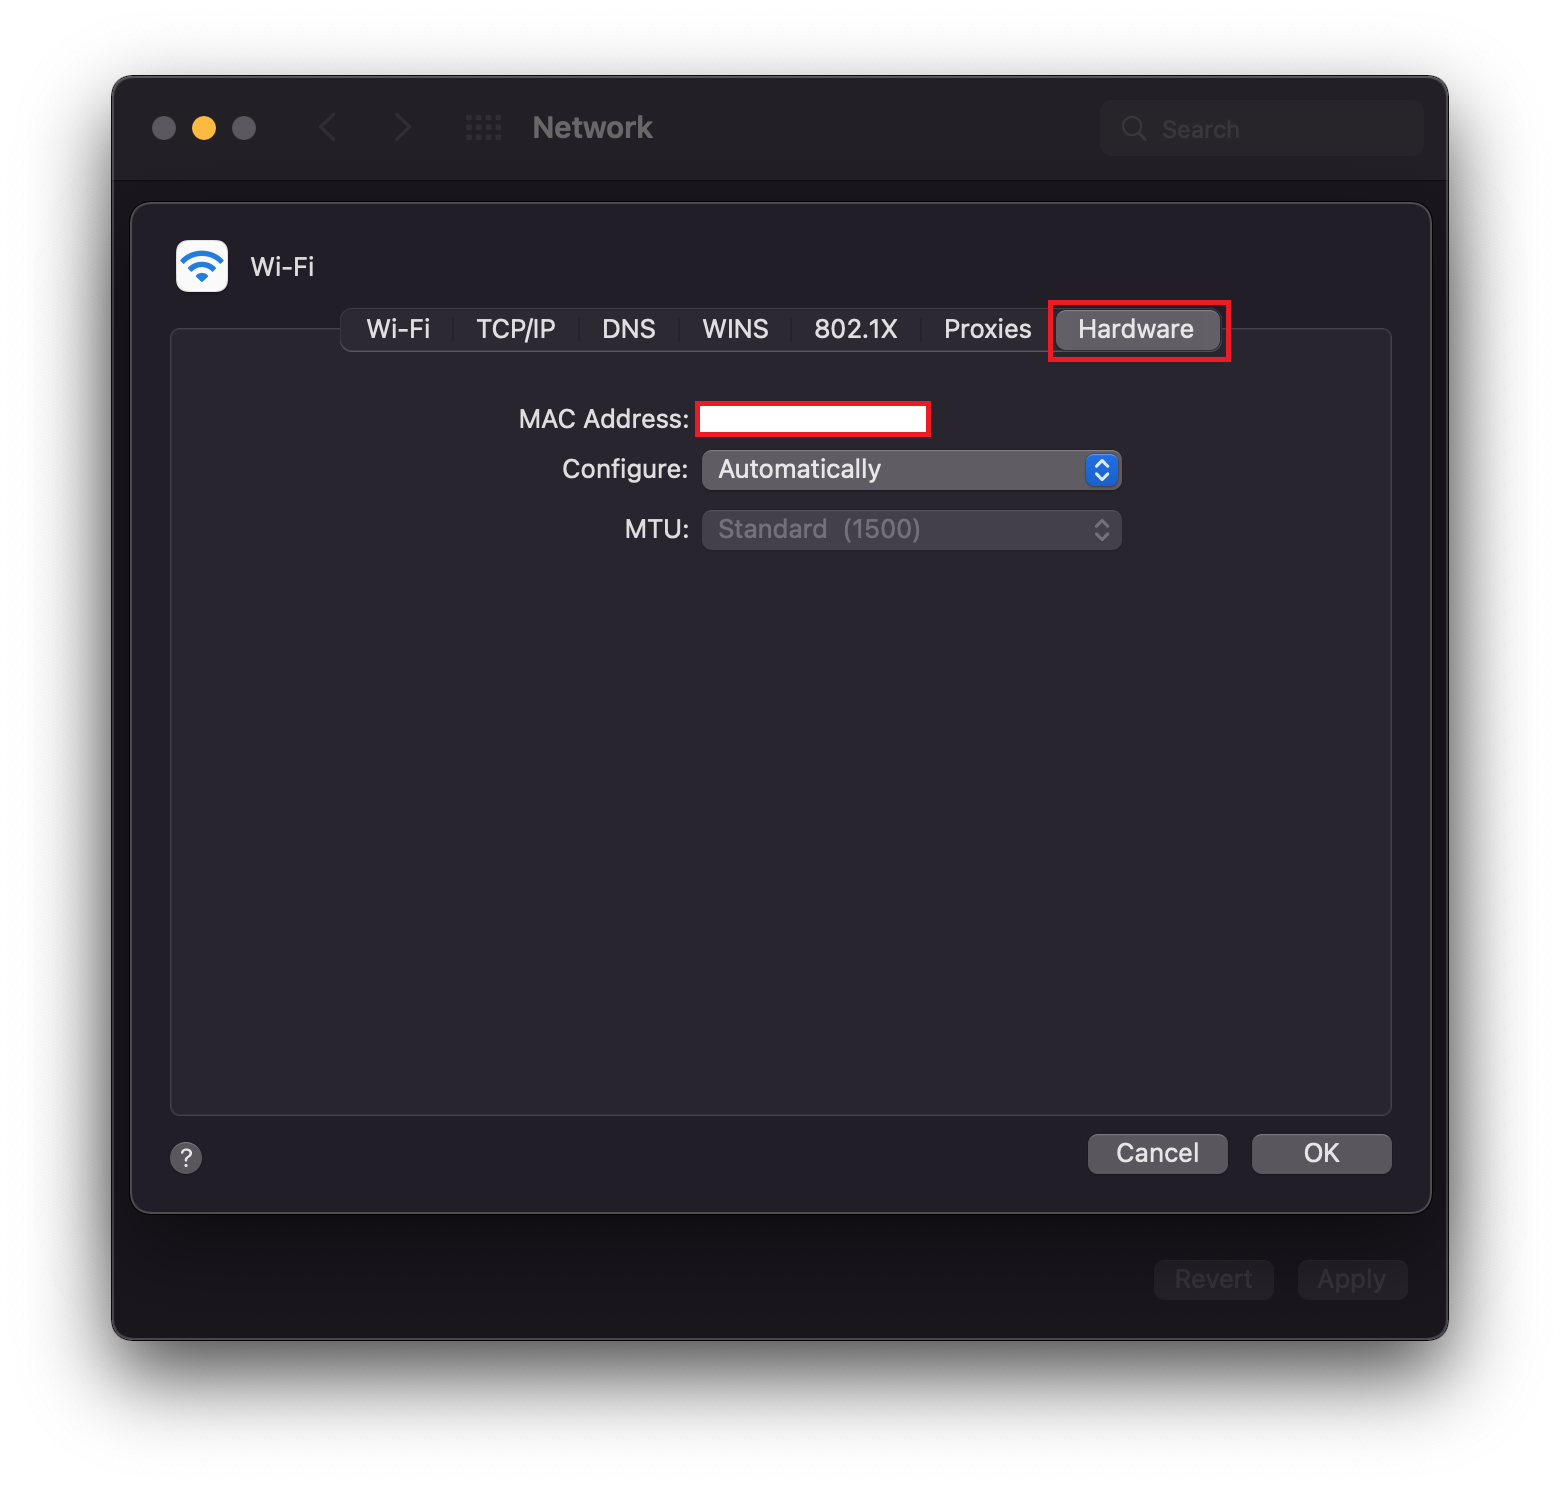
- To get the MAC address, click the button labeled Advanced... and then click on the Hardware tab.
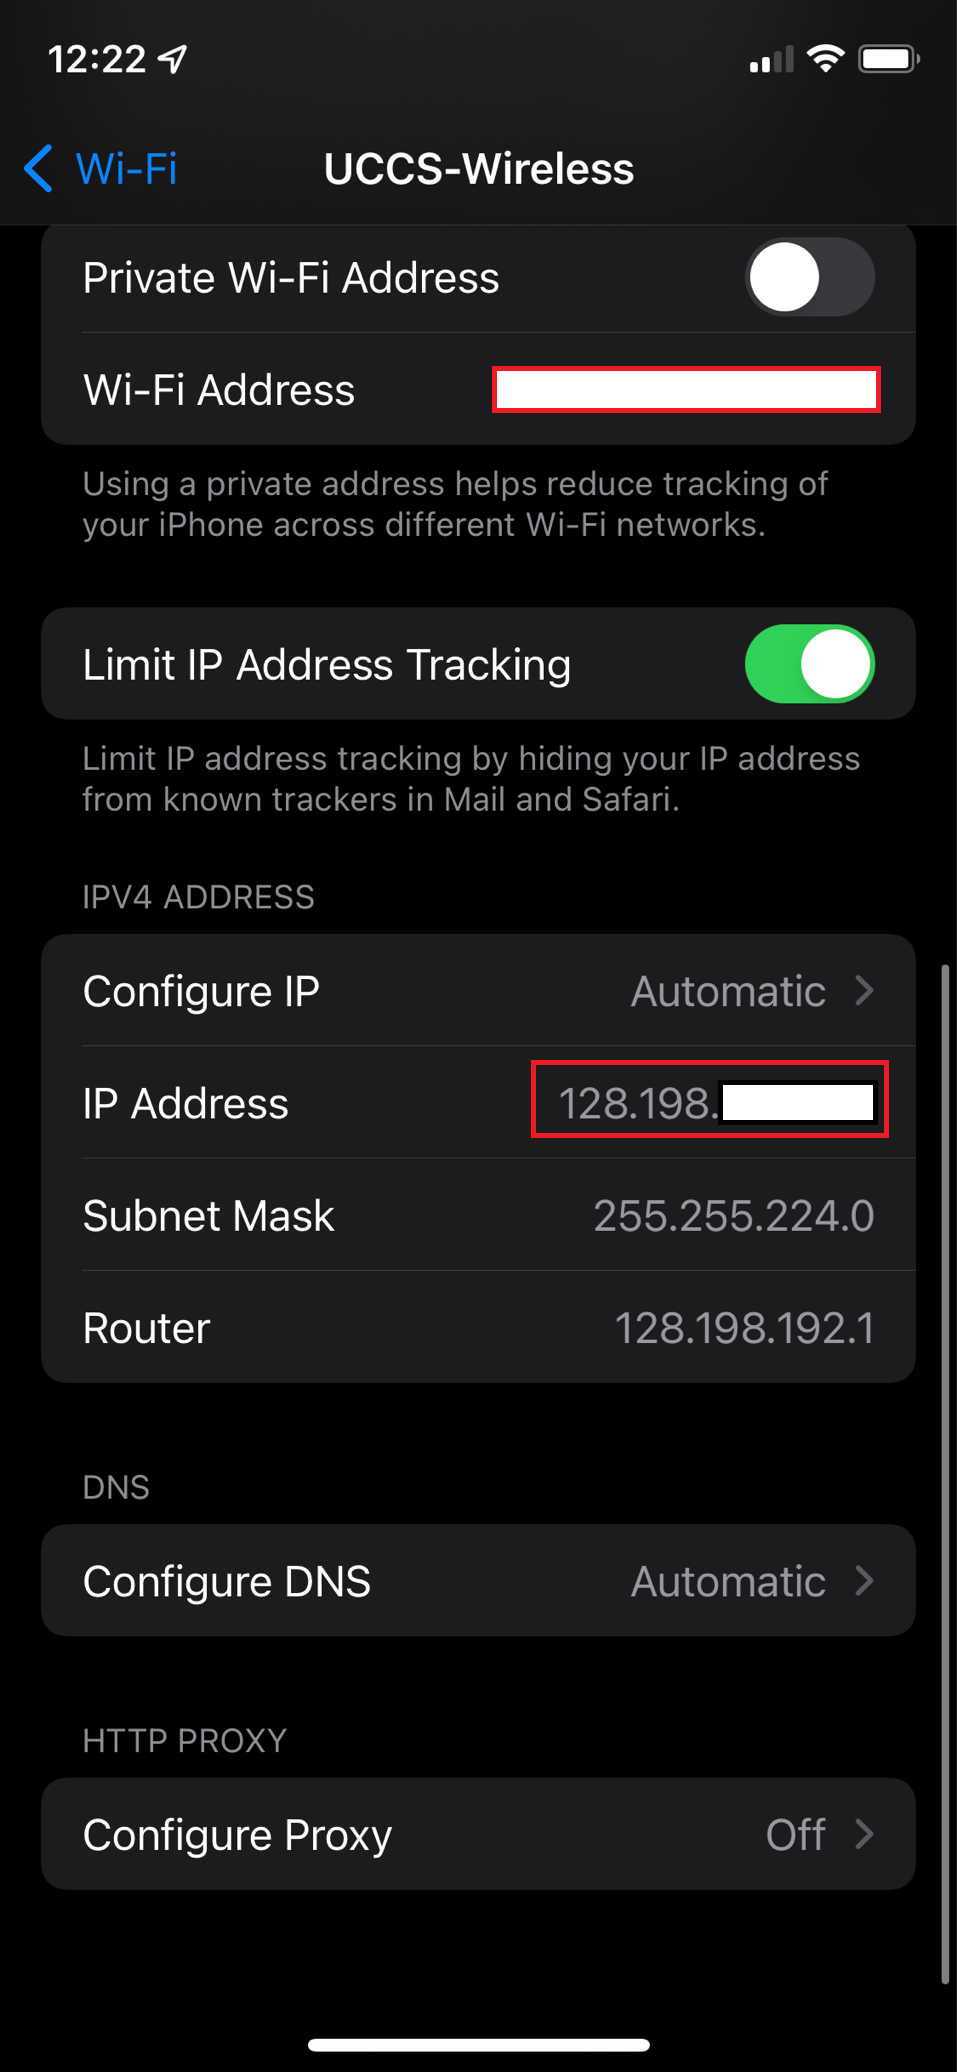
iOS/iPad OS:
- Open the Settings app and navigate to Wi-Fi and click on the Blue "i" icon next to the Wi-Fi network.
- The IP address and MAC address should be listed below.
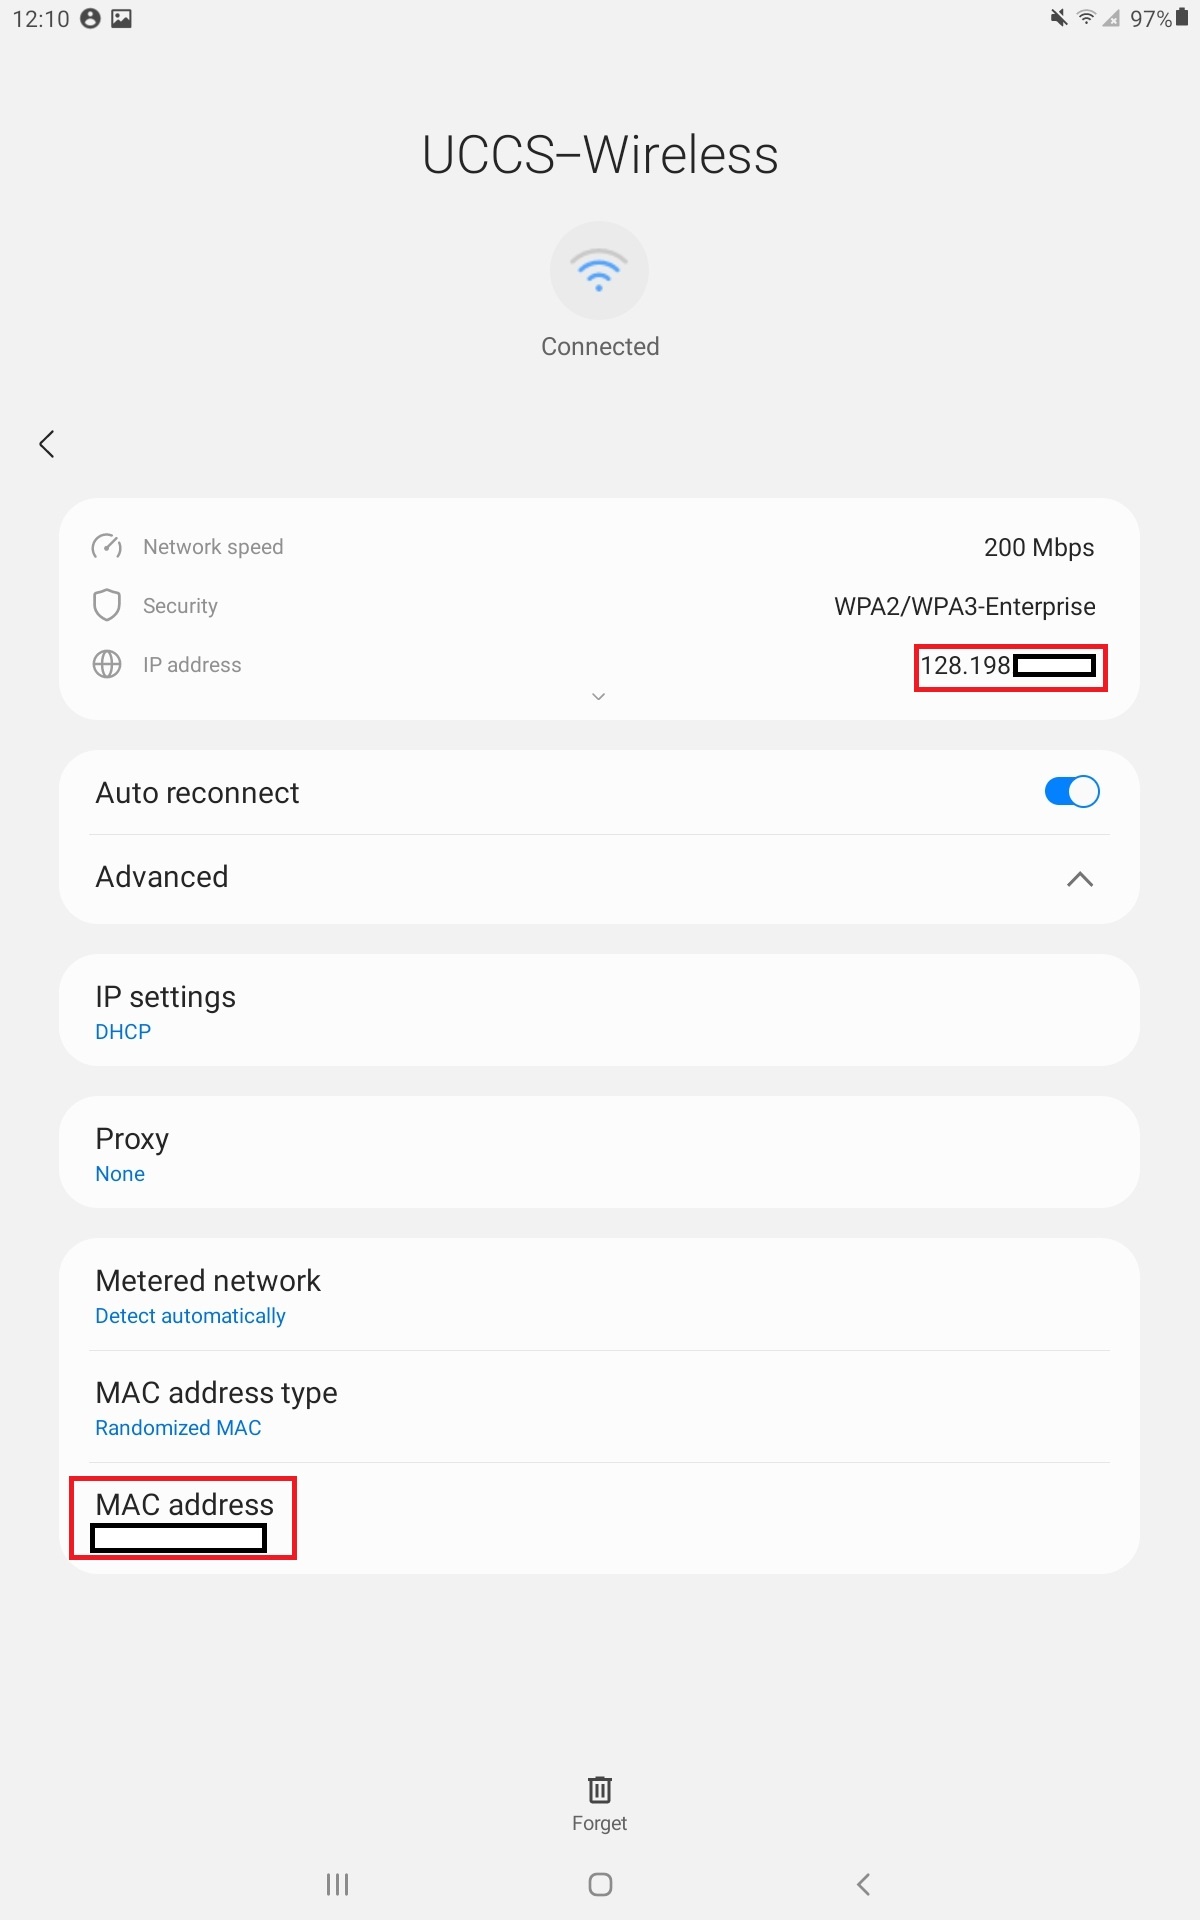
Android:
Note:
The device used here is a Samsung Tablet. This guide should work for most Android Phones and Tablets.
- Open the settings app, navigate to the Wi-Fi settings and click the settings cog next to the Wi-Fi network.
- The IP address should be shown. The MAC address is under the Advanced drop-down.
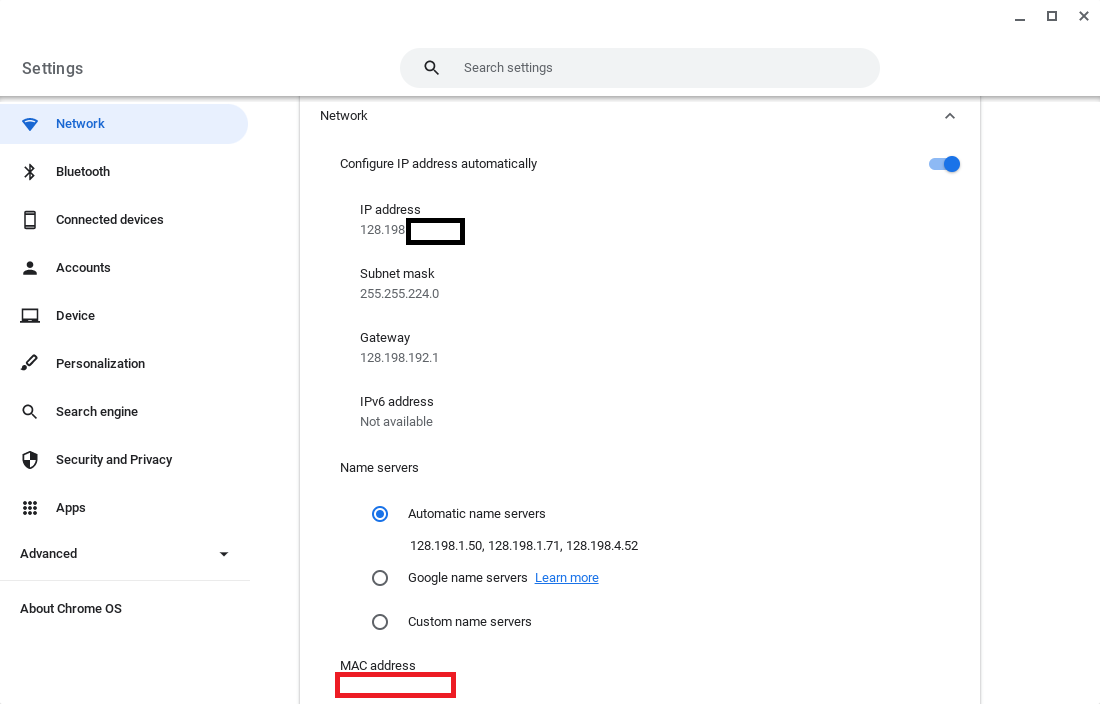
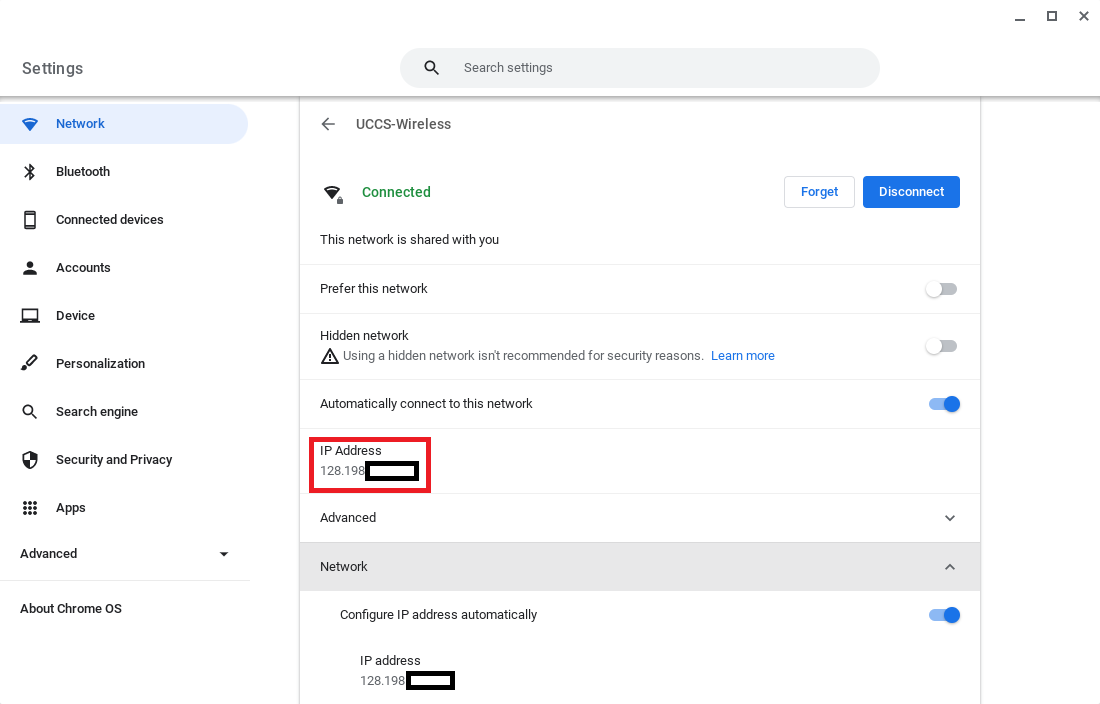
Chromebook:
- Open the Settings app and click on Network. The IP address will be right there
- There will be a drop down also labeled Network which has the MAC address listed just below
Related articles
Content by label
There is no content with the specified labels