This guide will assist you in adding the UCTR306-P printer to your Windows device. If you have a Mac computer, or if you have tried all the steps below and you are still having issues, please contact the OIT Service Desk with the options listed on our website: Get Help | Office of Information Technology (uccs.edu)
We will be more than happy to help you get connected!
Step 1: Ensure You Can Connect to the Printer
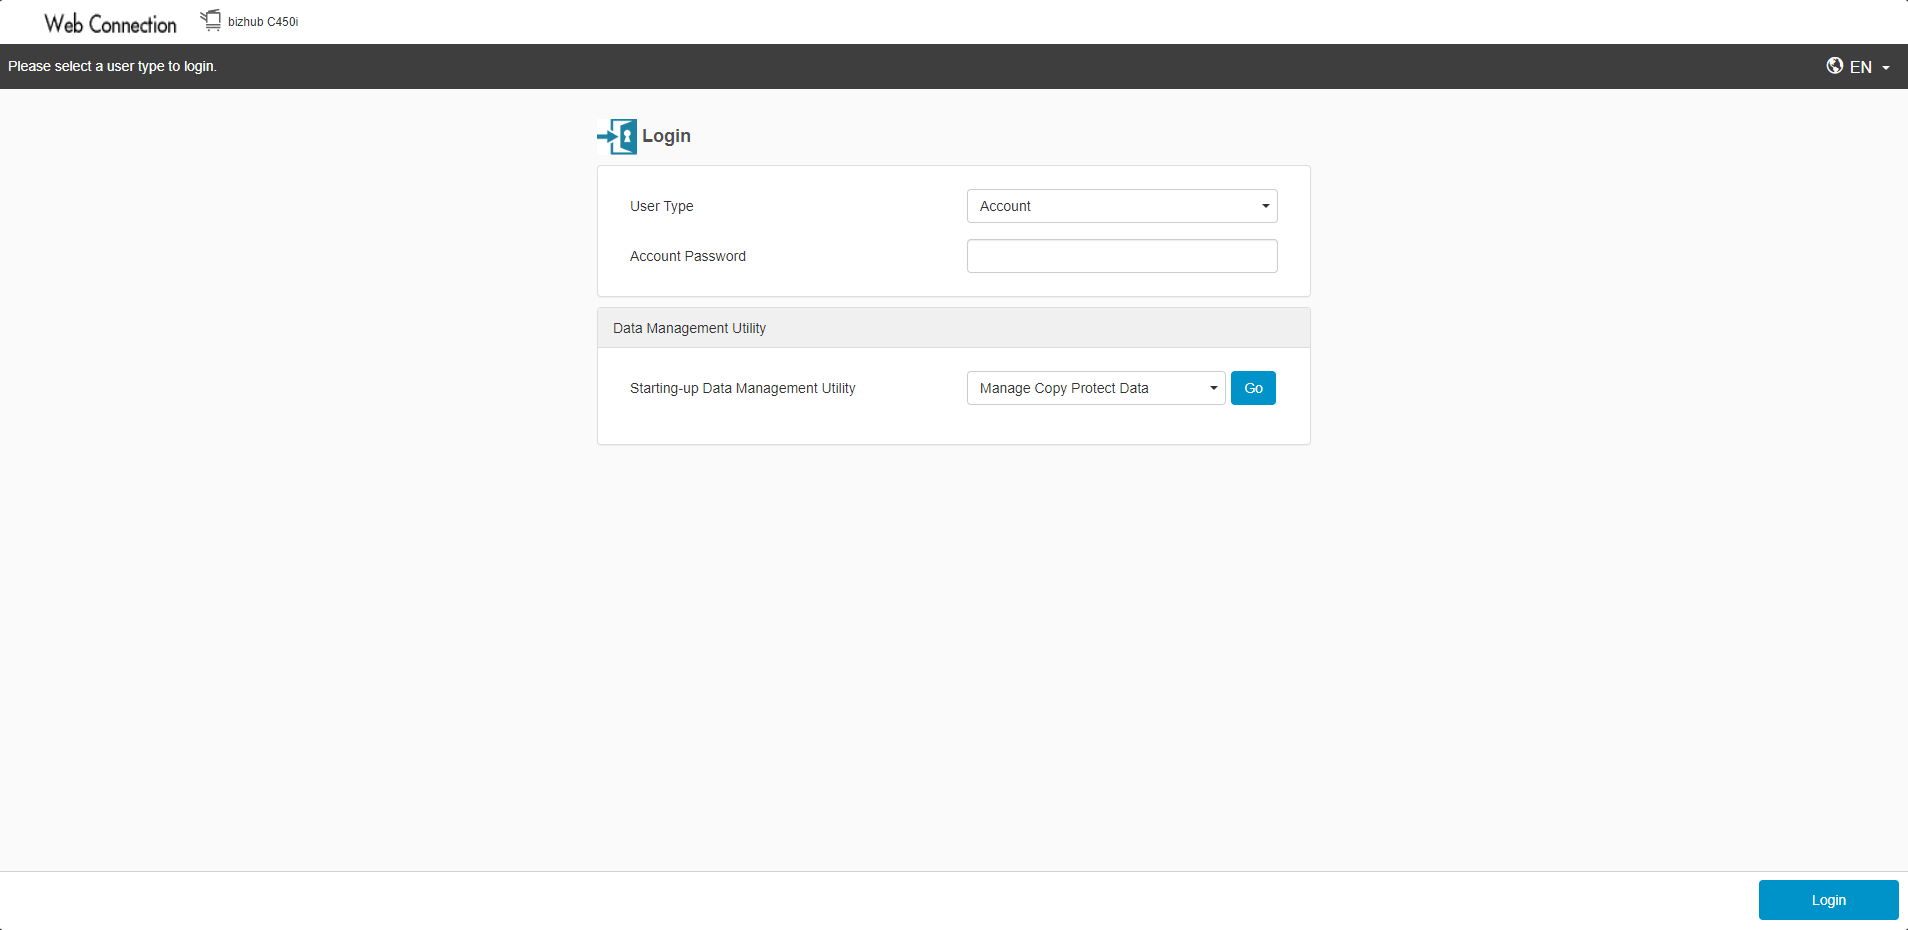
Before you start, make sure that you are able to connect to the printer. To test this, open a web browser and navigate to http://uctr306-p.uccs.edu/
When you go there, if you see the following page, you are successfully connected!
Step 2: Download the Correct Driver
Download the appropriate driver from the link here: https://cscsupportftp.mykonicaminolta.com/DownloadFile/Download.ashx?fileversionid=33272&productid=2277
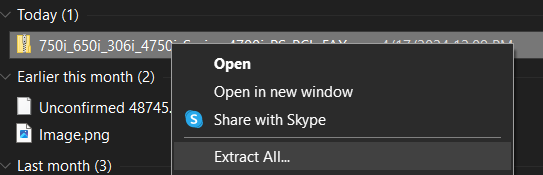
Once downloaded, extract the zip to a folder.
Right click the zip file, and choose "Extract All..."
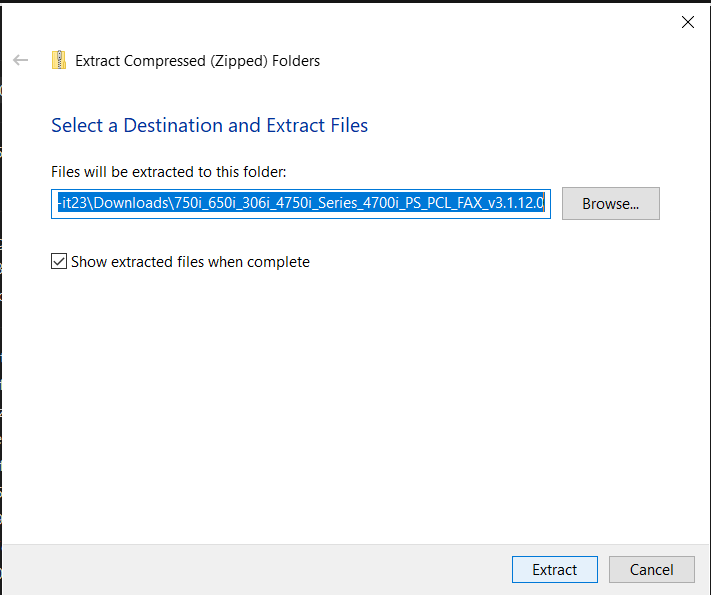
Then, you can choose the destination, or just select "Extract" to default to the Downloads folder.
Step 3: Install the Printer
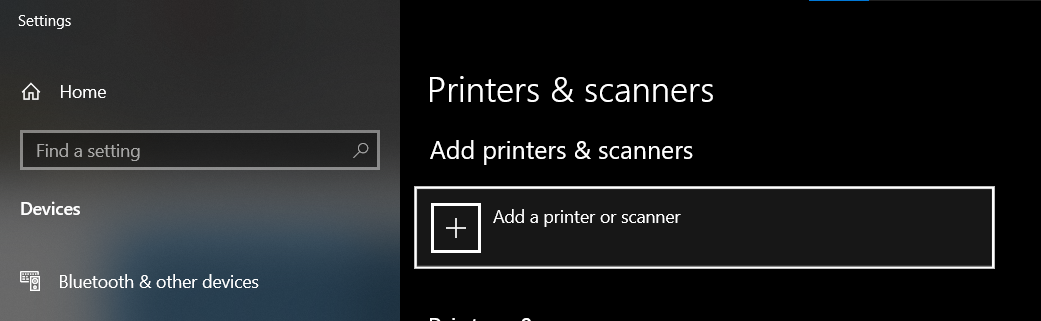
- Go to "Printers & Scanners" in the Windows Settings.

- Choose "Add a printer or scanner".
- Wait for a few seconds until "The printer that I want isn't listed" is shown at the bottom of the list. Click the "The printer that I want isn't listed" button.
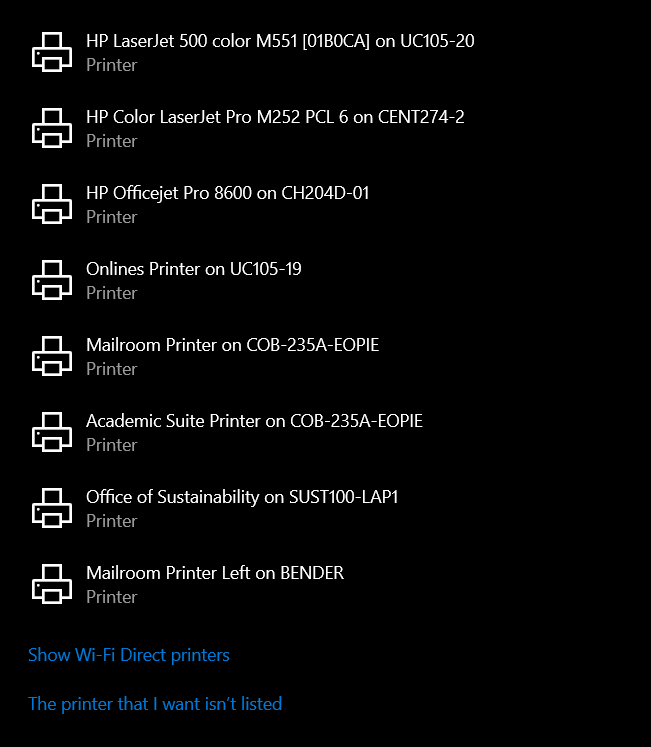
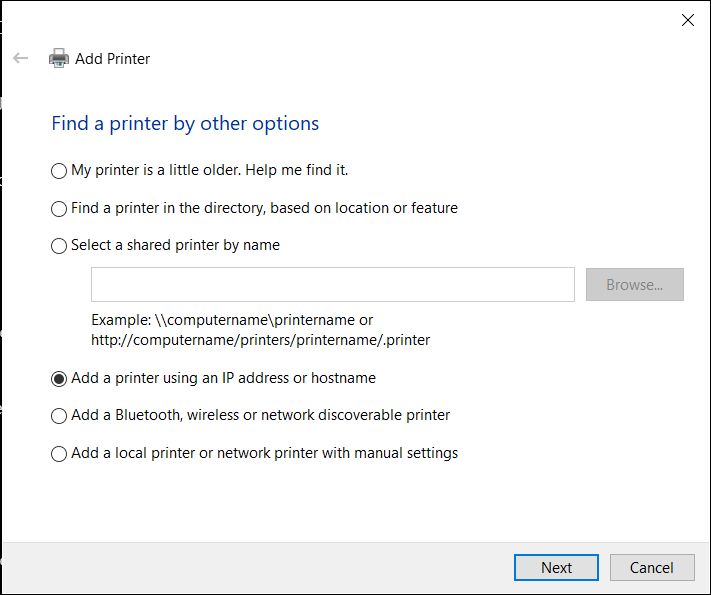
- Choose "Add a printer using an IP address or hostname". Choose "Next"
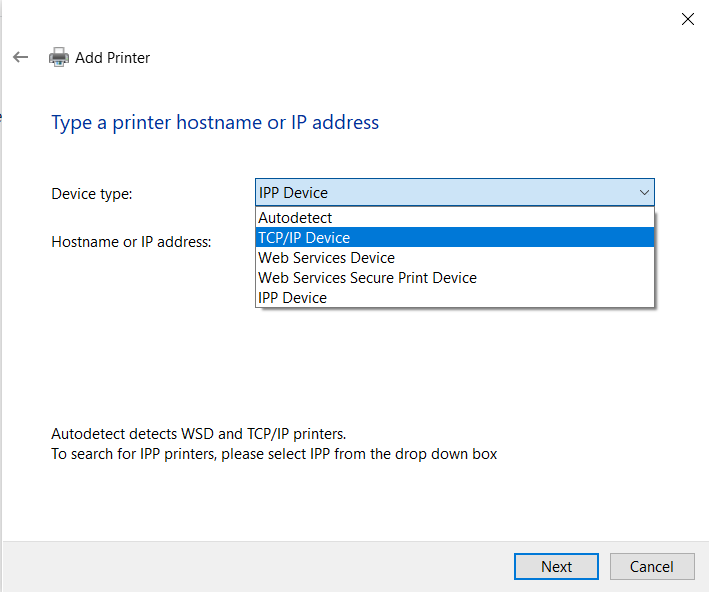
- For Device type, choose TCP/IP Device.
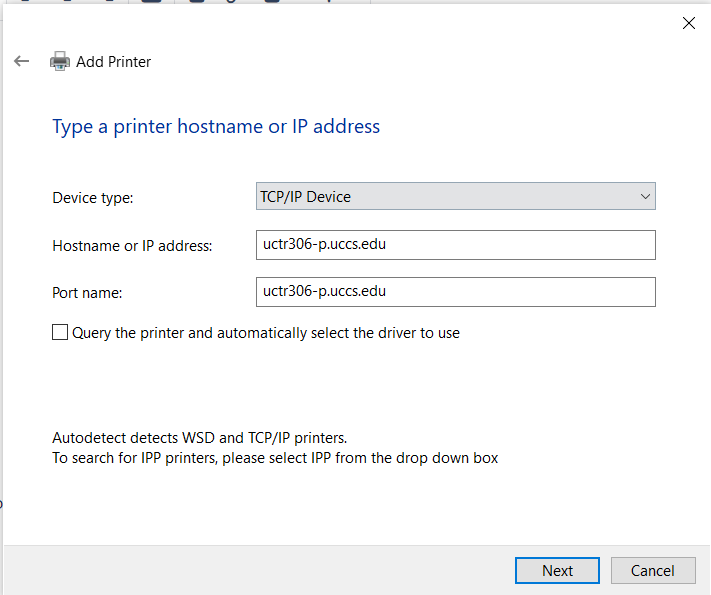
- For Hostname or IP address, enter uctr306-p.uccs.edu

- Uncheck "Query the printer and automatically select the driver to use". Click Next.
- Choose "Have Disk".
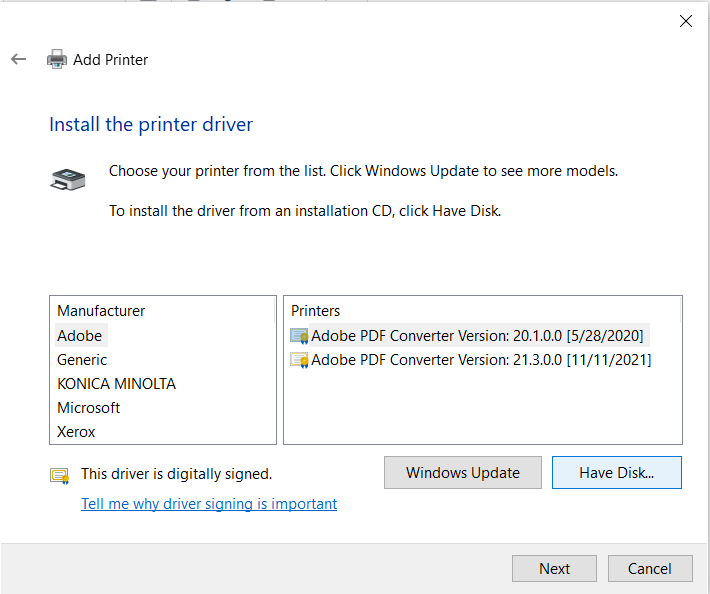
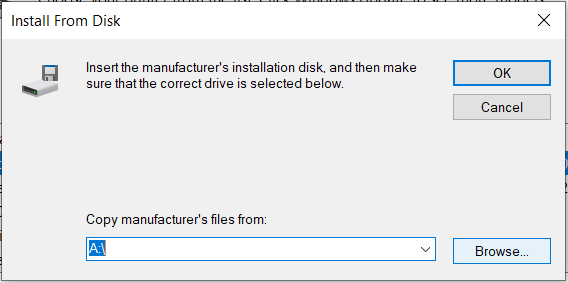
- Then, choose "Browse" and locate the folder to which you extracted the Zip file to.


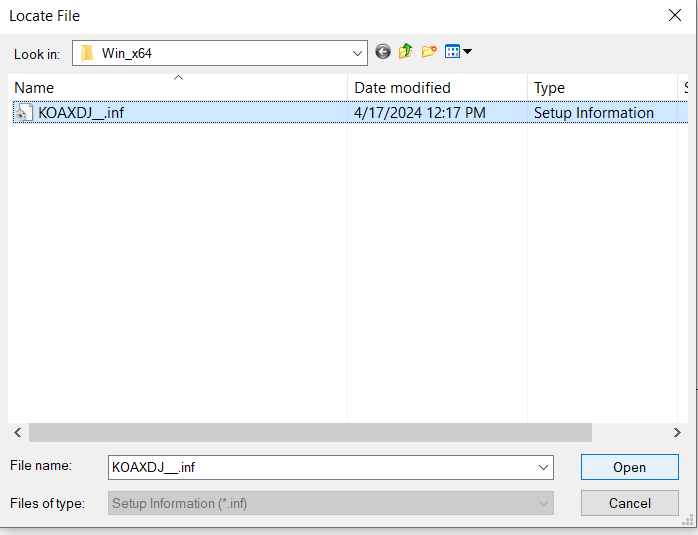
- Then, open the folders until you find the driver. The path will be "C750i_C650i_C306i_C4750i_Series_4700i_PS_PCL_FAX_v3.1.12.0 > Drivers > PCL > EN > Win_x64 > KOAXDJ__.inf". Select the file, and choose "Open"
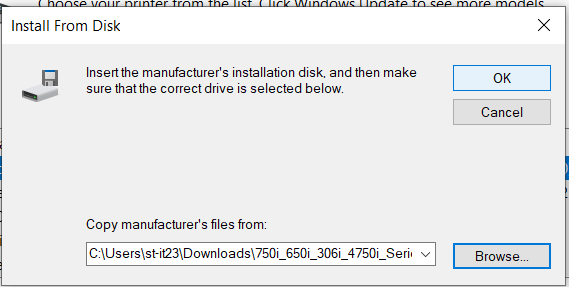
- Choose "OK"
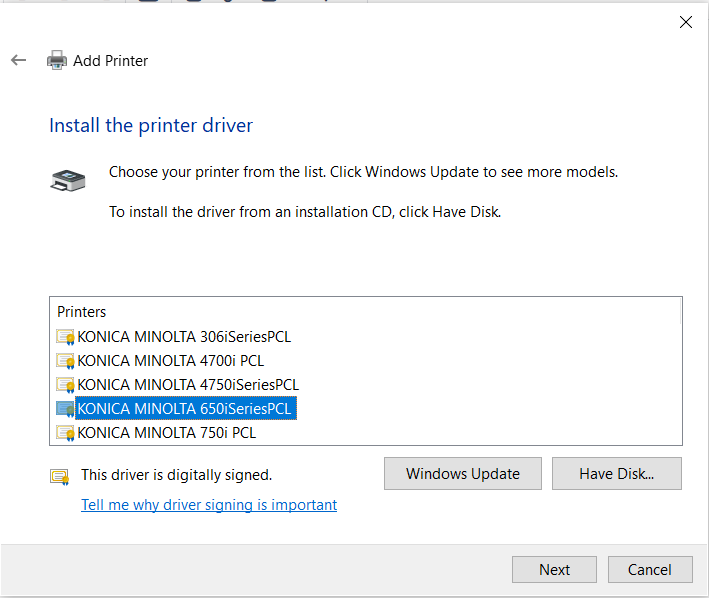
- Select "KONICA MINOLTA 650iSeriesPCL" and choose "Next".
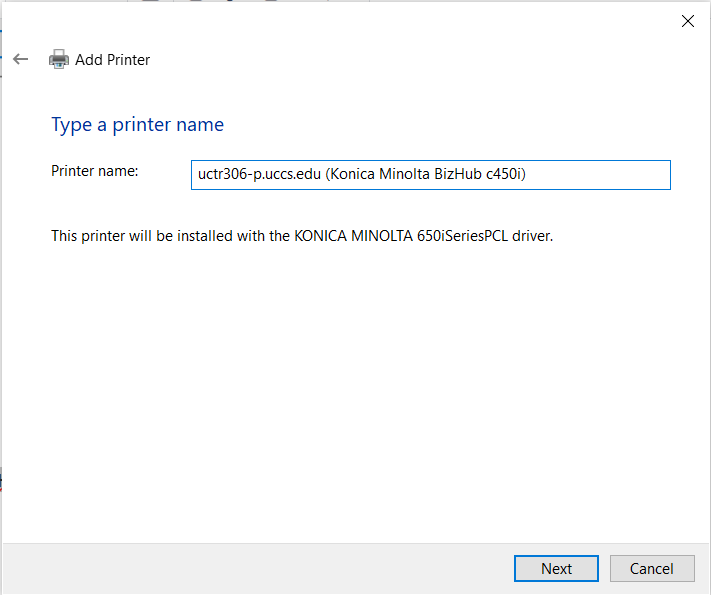
- Rename the printer to uctr306-p.uccs.edu (Konica Minolta BizHub c450i) and select "Next"
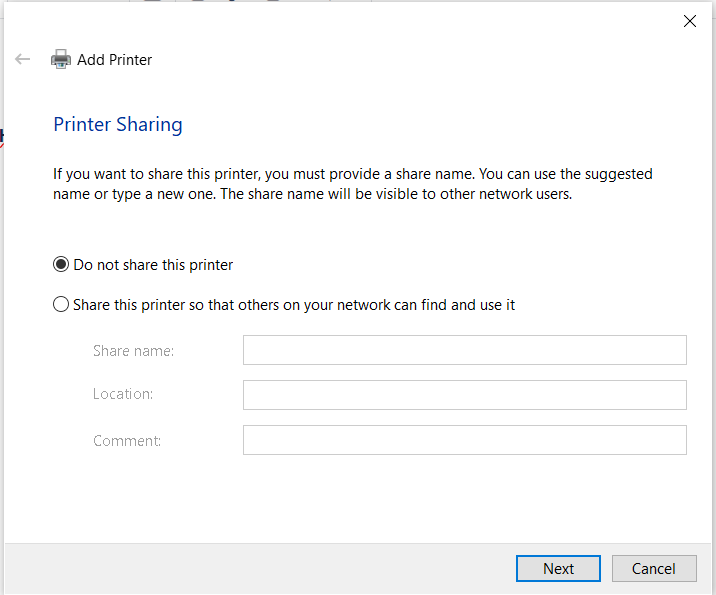
- Ensure the "Do not share this printer" option is selected and select "Next".
- If you would like, check the "Set as the default printer" box.
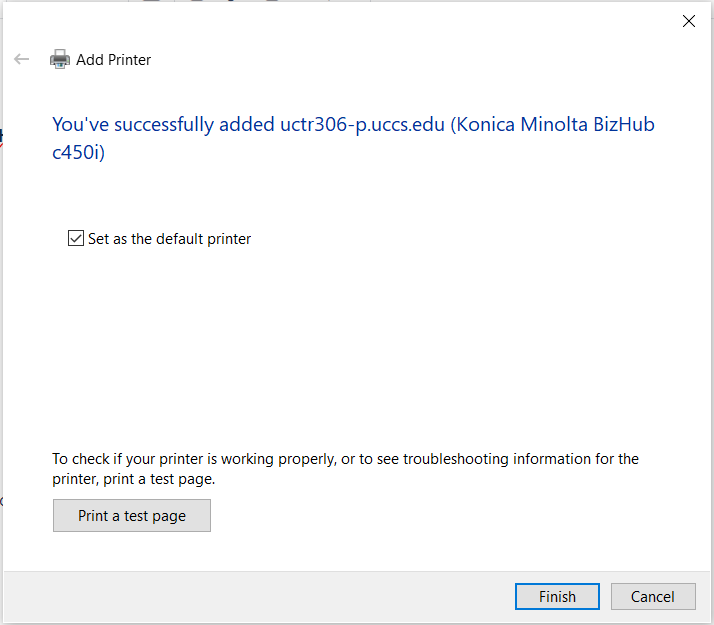
- Click "Finish"
Step 4: Test Print Functionality
Go back to the "Printers & Scanners" page. Click uctr306-p.uccs.edu (Konica Minolta BizHub c450i) and select "Manage".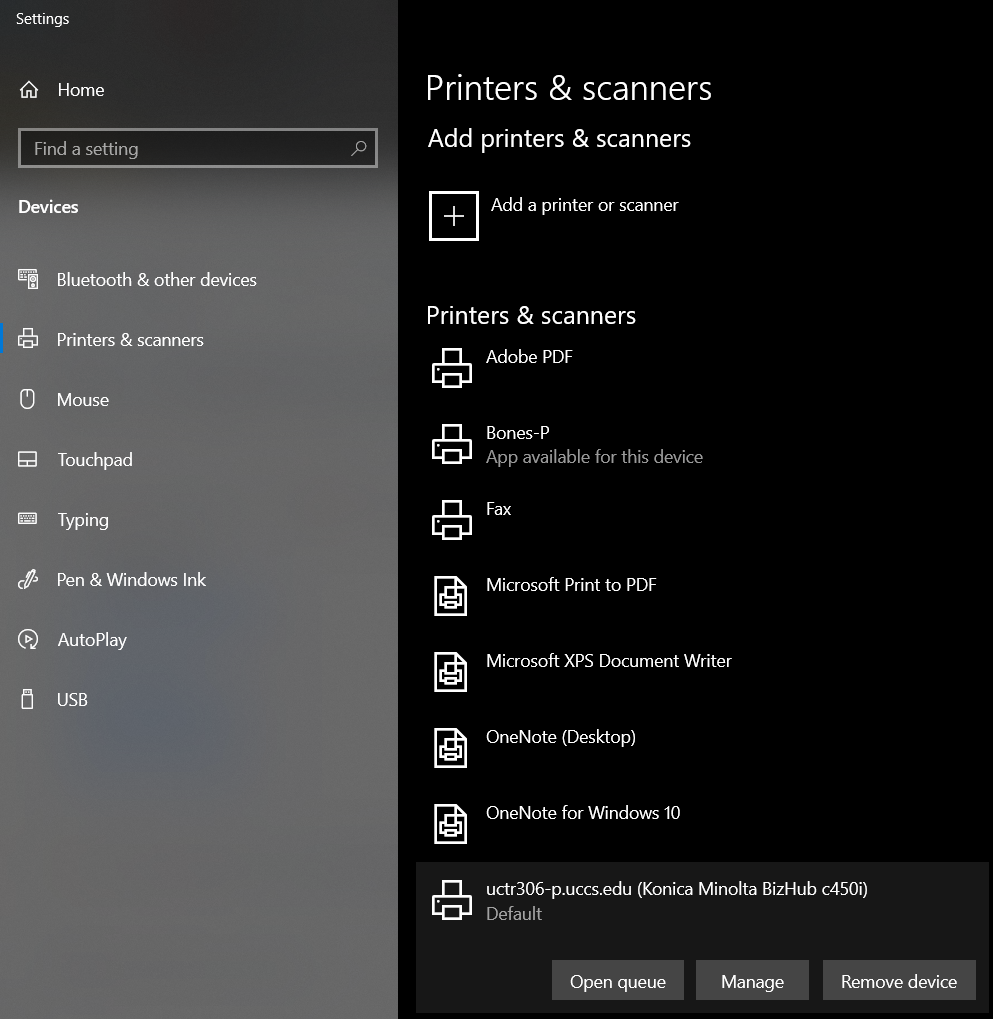
Choose "Print a test page" and make sure that the job completes successfully.

Now, try to print a document of your own to the printer. Make sure you select uctr306-p.uccs.edu (Konica Minolta BizHub c450i) when selecting a printer.
Still Having Issues?
If you have tried all the steps above and you are still having issues, please contact the OIT Service Desk with the options listed on our website: Get Help | Office of Information Technology (uccs.edu)
We will be more than happy to help you get connected!